“Learn how to effortlessly install a central vacuum system in your home with our comprehensive guide. Discover step-by-step instructions, essential tools, and expert tips for a convenient and efficient way to maintain a clean and healthy living environment.”
Table of Contents
- Relevant Article
- Today we’re going to be talking about how to install a central vacuum system in your home.
- Benefits of a Central Vacuum System
- Materials Needed:
- How to Install a Central Vacuum System in your home: A Detailed Walkthrough
- Central vacuum low voltage wire connection
- How to install central vacuum floor sweep
- How to connect low voltage wires to central vacuum
- How to replace a central vacuum wall inlet
- How to install central vacuum in existing home
- How to install central vacuum piping
- Can you install central vacuum after house built
- How much to install a central vacuum system
- How to install a central vacuum system – A detailed demonstration
Relevant Article
- How to choose a central vacuum system
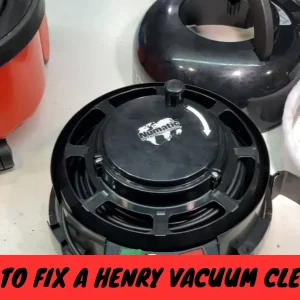
- How to Fix Central Vacuum System
- How to maintain a central vacuum system
- How to remove a central vacuum system in your home
Today we’re going to be talking about how to install a central vacuum system in your home.
My professional advice can help you achieve a new level of convenience and cleanliness at home by showing you how to install a central vacuum system in your home. Are you tired of the inconvenience and limitations of conventional vacuums? Imagine how easy it will be to remove dirt, allergens and dust from every corner of your home, while also increasing its market value. Whether you’re an experienced handyman or a first-time homeowner, our detailed instructions and insightful advice will ensure you can complete the DIY installation process smoothly. This thorough tutorial on installing a central vacuum system in your home will help you say goodbye to the hassle of vacuuming and hello to a better lifestyle.
Benefits of a Central Vacuum System
Before we delve into how to install a central vacuum system in your home procedure, let’s explore the advantages of a central vacuum system. These advantages include:
- Powerful Suction: The central vacuum system incorporates the best possible suction power to ensure thorough cleaning.
- Quiet Operation: The main unit of a central vacuum system is usually placed away from living areas, resulting in a quieter vacuum.
- Allergen Reduction: Central systems often offer better filtration, leading to a reduction in airborne allergens.
- Convenience: A wall inlet can be started cleaning by attaching a hose, eliminating the need to drag a lot of vacuum around.
- Increased Home Value: Prospective home buyers may find a central vacuum system an attractive selling point.
Materials Needed:
- Central vacuum unit
- Vacuum pipes and fittings (PVC or other suitable material)
- Mounting brackets and screws
- Low-voltage wiring and connectors
- Inlet valves
- Exhaust pipe (if required)
- Tools (drill, saw, screwdriver, PVC glue, wire stripper, etc.)
How to Install a Central Vacuum System in your home: A Detailed Walkthrough
How to install a central vacuum system in your home here I will show you step by step
Planning the System
To ensure a successful installation, it is important to plan carefully before starting the process. Consider the following points at this initial stage:
- Central Unit Location: Select a suitable site for the central vacuum unit to ensure optimum performance. Typically, this area is found in a utility room, basement or garage. Ensure that the selected location has access to an electrical outlet and is convenient for routine maintenance and repairs.
- Routing the Vacuum Pipes: Carefully design the path for the vacuum lines that will connect the central unit to the inlet valve. Choose the most convenient and straight path, take care to avoid obstacles and minimize the number of turns or curves.
Installing the Central Unit
The central unit acts as the brain of the system and proper installation guarantees its effective operation:
- Mounting the Central Unit: Use the included mounting bracket to securely attach the central unit to your chosen location. It is very important to ensure that the unit is installed securely and evenly.
Installing Vacuum Pipes
Before you start installing vacuum pipes, it’s essential to establish suction routes throughout your home:
- Creating Openings: In designated areas, carefully create openings in walls, ceilings, or floors for vacuum pipes. Depending on the material, use appropriate tools such as saws or drills.
- Cutting and Shaping Pipes: Trim the vacuum pipes to the required length according to your planned route. Employ elbows, couplings and other fittings to effectively navigate around bends and obstacles.
- Dry-Fit Pipes and Fittings: Perform a dry-fit by joining the components together without using glue before permanently securing the pipes. This step ensures precise alignment with your layout.
- Gluing Pipes and Fittings: Once you are satisfied with the dry-fit, use PVC glue or recommended glue to securely attach the pipes and fittings. Follow the manufacturer’s instructions to ensure proper application of the adhesive..
Installing Inlet Valves
To facilitate connecting the vacuum hose and cleaning different areas of your home, inlet valves are necessary:
- Attaching Inlet Valves: Attach the inlet valve to the vacuum pipe at the specified location. Use screws or brackets to firmly secure the valves in place.
Connecting Low-Voltage Wiring
When you connect the hose to an inlet valve, the low-voltage becomes an important component that facilitates the on and off functions of the central vacuum system:
- Running Wiring: Make sure you connect each inlet valve position to the central unit using a low-voltage wire. To ensure safety and a neat appearance, cover and shield the wire.
- Wiring Connection: Strip the wire ends and use suitable connectors to connect the wire ends to each inlet valve and central unit terminals. Follow the manufacturer’s recommendations to ensure proper wiring.
Exhaust Pipe Installation (if applicable)
Depending on the construction of your central vacuum system, the need for an exhaust pipe to exhaust outside air may vary:
- Routing the Exhaust Pipe: If your system requires an exhaust pipe, be sure to follow the manufacturer’s instructions and route it through an exterior wall. This ensures proper and safe release of exhaust air.
Testing the System
To ensure optimal performance, the central vacuum system must be tested before installation is complete:
- Testing Suction: Check that the system turns on by connecting a central vacuum hose to an inlet valve. To ensure uniform performance, check the suction capacity at each inlet valve.
Finalizing the Installation
Once the test is successful, you are on the verge of enjoying the benefits of your central vacuum system. The final step How to install a central vacuum system in your home as follow:
- Securing Wires: Secure any unbonded low-voltage lines using wire clips or ties. This prevents them from becoming a trip hazard and maintains a tidy appearance in the area.
- Insulating Pipes: Consider insulating any exposed vacuum pipes to reduce sound transmission and prevent condensation formation.
- Closing Openings: When sealing holes made during wall, ceiling or floor installation process, use suitable materials. This protects the structural integrity and aesthetic appeal of your property.
Central vacuum low voltage wire connection
Central vacuum low voltage wire connection. Vacuum systems have come a long way since the days of hand-held vacuum cleaners. A central vacuum system is a much more powerful system than your average vacuum cleaner. A central vacuum system is one of the most helpful things to know if you’re considering installing one in your home. how to install a central vacuum system in your home
Central vacuum low voltage wire installation is fairly straightforward. A detailed installation guide will be included with most systems. The first step is to find the location of the power unit. The power unit is usually located in the basement or garage. Once the power unit is located, the next step is to find the location of the vacuum inlets. The vacuum inlets are usually located in the ceilings or walls. The next step is to connect the low voltage wire to the inlets.
How to install central vacuum floor sweep
How to install central vacuum floor sweep? There should be a central vacuum floor sweep in every home. The best part is that you don’t have to use a broom to clean your entire house. Installation is relatively simple, but the instructions that come with the product will walk you through the steps. It’s well worth the investment!
How to install your central vacuum floor sweep d 0900, first find the center of your room and mark it with a piece of tape or chalk. Next, measure out 2 feet in each direction from the center
mark and mark those points as well. Now, connect the marks with a straight line and cut along that line with a utility knife. Be sure to wear gloves and a dust mask when doing this.
After you’ve cut the hole, place the floor sweep into the hole and secure it with the screws provided. Now, connect the power cord to the floor sweep and plug it into an outlet. Finally, turn on the vacuum and enjoy clean floors! if you can do this perfectly then you will see that your floor is perfectly clean also you know how to install central vacuum floor sweep
Installing a central vacuum floor sweep is a relatively easy process. First, find the area where you want to install the sweep and mark the center of the room. Next, drill a hole in the center of the room and insert the vacuum hose. Then turn the vacuum on while connecting the floor sweep to the hose.
After Install central vacuum floor sweep then now you need to know how to install a central vacuum system in your home.
How to connect low voltage wires to central vacuum
How to connect low voltage wires to central vacuum. Central vacuum systems use low voltage wiring to operate. Installing the wires correctly is very important since they pass through much of the house. If the wires are not installed correctly, the vacuum will not be able to suck up the dirt, and the wires may pose a fire hazard.So you need to know perfectly how to connect low voltage wires to central vacuum. How to install a central vacuum system in your home
In order to connect low voltage wires to a central vacuum, a low voltage wiring kit is required. You will receive instructions on how to wire the vacuum properly with this kit. Once the kit is installed, you will need to connect the low voltage wires to the terminals on the vacuum. Make sure to connect the wires to the correct terminals, as this will ensure that the vacuum will operate properly.
When you connect low voltage wires to the central vacuum, now you need to know How to install a central vacuum system in your home.
If you are interested in a central vacuum system, and you want to choose the best vacuum then this is for you. How to choose a central vacuum system, when choosing your vacuum then you need to know How to install a central vacuum system in your home.
How to replace a central vacuum wall inlet
There is a central vacuum system in our house that blows air continuously downstairs. After some research, we found out that the inlet wall is what allows air from the vacuum to flow out and it is likely stuck. It is also likely that the inlet wall has deteriorated over time.
How to install a central vacuum system in your home
How to Replace a Central Vacuum Wall Inlet? To replace a central vacuum wall inlet, first turn off the power to the vacuum at the circuit breaker. It is necessary to unscrew the old inlet from the wall in order to remove it. Install the new inlet by screwing it into the wall. Turn on the power to the vacuum at the circuit breaker, and test the new inlet.
If your central vacuum wall inlet is replaced then you need know How to install a central vacuum system in your home
How to install central vacuum in existing home
Installing a central vacuum system in an existing home is a relatively easy process. The first step is to determine where the central vacuum unit should be placed. This is typically in the basement or garage. You will need to run vacuum tubing from the unit to the various outlets throughout the house once you have determined the location. The final step is to install the vacuum heads in each room.
Most of the time, all you need is a little creativity to make a house feel like home. As time goes by, you may find yourself wanting a new look or a change of pace and investing in a central vacuum system may be the perfect solution.
For homeowners who are looking to install a central vacuum but don’t want to drill into the floor, we’ve got a few tips on How to install a central vacuum system in your home
1) Determine where you want the unit to go.
2) Call your local vacuum store and have them come out to help you measure the space
3) Order the unit
4) Install the unit
5) Connect the vacuum tubes and power
You can read more about, How to remove a central vacuum system in your home and also you need to know how to install a central vacuum system in your home
How to install central vacuum piping
How to install central vacuum piping? The installation of central vacuum piping is a relatively straightforward process. First, mark the desired location of the piping on the wall. Next, use a drill to make holes for the piping. After the holes are made, insert the piping into the holes and secure it with screws. Finally, attach the vacuum hose to the piping and turn on the vacuum to test it.
When installing central vacuum piping, there are a few things to keep in mind. Make sure your vacuum system’s piping is the right size. Second, when connecting the piping to the vacuum unit, be sure to use a coupling that is compatible with the type of pipe you are using. Finally, when running the piping through the home, be sure to avoid areas where there might be potential for leaks.
Can you install central vacuum after house built
Can you install central vacuum after house built? If you want to save money and do your own installation of your central vacuum, you can save yourself a lot of time and money by doing some simple planning before you start.
Yes, you can install a central vacuum after your house is built. It is not a difficult process, but it is important to follow the instructions carefully. You will need to purchase the central vacuum unit and the necessary tubing. The tubing can be run through the walls or under the floors. Once the tubing is in place, you will need to connect the unit to an electrical outlet.
How to install a central vacuum system in your home? Installing a central vacuum after a house is built is possible, but may be more difficult and expensive than if it were installed during construction. It is important to consult with a professional to determine the feasibility and cost of such a project.
If you want then you need to know How to maintain a central vacuum system and also you read more about how to install a central vacuum system in your home
How much to install a central vacuum system
How much to install a central vacuum system? Central vacuum systems, or central vacs, vacuum multiple rooms from a central location. A central vacuum system can be installed by a professional or an experienced do-it-yourselfer. Some systems come with installation instructions and most of the time, a central vacuum system will only take a few hours to install.
Your house’s size will determine how much work it will take to install a central vacuum system. The average cost to install a central vacuum system is $500 to $2,000.
In this article i will show you How to install a central vacuum system in your home. thanks for reading this article hope you will benifit from this article.
How to install a central vacuum system – A detailed demonstration
Conclusion
How to install a central vacuum system in your home? Although the installation of a central vacuum system may seem challenging, it is a manageable project with thorough planning and meticulous execution. This effort provides lasting benefits and cleanliness. By following the guidelines in this article, you can achieve a tidier and more pleasant home.
FAQs
Yes, central vacuum systems can be installed in existing homes, although it might require some modifications.
While it’s possible to install a central vacuum system yourself, seeking professional help can ensure a seamless installation.
Depending on usage, it’s recommended to empty the canister every 2-3 months.
Yes, central vacuum systems are versatile and work well on various floor types, including carpets, hardwood, and tiles.
Can I relocate the inlet valves after installation?
It’s possible but may involve significant work, so it’s best to plan their locations carefully during the initial installation.